
Master the specialized DIY steps required to securely mount and seal your air conditioner in windows with exterior storm frames.
Keeping your home cool during the height of a humid American summer is a priority, but for those living in older homes or specialized housing, the architecture can sometimes present a challenge. If you are staring at your window and wondering how to install a window air conditioner with a storm window, you are not alone. Many homeowners find that the presence of a storm window frame creates a physical gap or a height imbalance that prevents a standard AC unit from sitting securely on the windowsill.
Fortunately, with a few simple tools and some strategic adjustments, you can achieve a professional, airtight installation that protects your window frame and keeps the frosty air inside where it belongs. This guide walks you through the entire process, ensuring your summer is defined by comfort rather than DIY frustration.

Understanding the Storm Window Challenge
The primary issue with storm windows is the metal or wood track that sits on the exterior of your primary window sill. This track is usually an inch or two higher than the interior stool. When you try to set an air conditioner down, the unit will often tilt backward at a dangerous angle or rest its weight entirely on the thin aluminum frame of the storm window, which is not designed to support forty to eighty pounds of machinery.
To fix this, you need to create a level playing field. Before you lift the unit, you must bridge the gap between the interior sill and the exterior storm window frame. This ensures the air conditioner has a flat, stable surface to rest on, allowing the drainage system to function correctly without damaging your home’s exterior.
Gathering Your Installation Supplies
Before you begin, clear a workspace and gather your materials. You will need your air conditioner unit, a tape measure, a drill with various bits, and weatherstripping. Most importantly, you will need a “spacer” or “riser.” This is typically a piece of scrap wood, such as a 2×4 or a 1×2, cut to the width of the window opening.
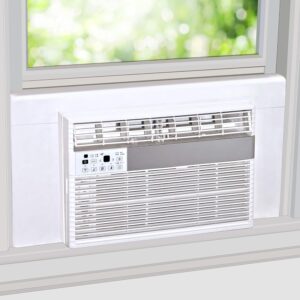
For a truly polished and energy-efficient finish, consider upgrading your side materials. While most units come with plastic accordion wings, these are notorious for leaking air and noise. You may try using surround insulation side panels instead. These panels provide superior insulation against heat transfer and help muffle the sound of city traffic or neighborhood lawnmowers.
 |
| Buy it on Amazon |
Step by Step Leveling and Placement
Start by measuring the height of your storm window track. You want your wooden spacer to be slightly taller than that track—usually about a quarter-inch higher. Place the wood block on the interior windowsill (the stool). This block will now take the weight of the air conditioner, lifting it just enough to clear the storm window frame.
I always recommend wrapping the wooden spacer in a bit of waterproof duct tape or painting it to match the window. This prevents moisture from the AC’s condensate from rotting the wood over time.
Once your spacer is in place, lift the air conditioner into the window. Position the bottom rail of the AC unit firmly against the wooden spacer. As you lower the sash of the window, ensure it catches the top rail of the air conditioner. This “sandwich” effect is what holds the unit in place.
Securing the Unit for Safety
Safety is paramount when an appliance is hanging out of a second-story window. Most air conditioners come with an L-bracket that secures the top of the unit to the window sash. Do not skip this step. If someone accidentally lifts the window sash from the inside, the bracket prevents the air conditioner from sliding out and falling.
If your window frame is particularly old or the wood is soft, pre-drill your holes to prevent splitting. Once the sash is locked down, check the tilt of the unit. A slight backward tilt—usually about half an inch—is necessary for most older units to drain water toward the outside. However, many modern units are designed to run level and use a “slinger ring” to splash water onto the cooling coils for efficiency. Always consult your specific manual to see if a tilt is required.
Sealing the Gaps for Maximum Efficiency
A window air conditioner is only as good as the seal around it. If you can see daylight through the sides or top of the unit, you are essentially paying to cool the entire neighborhood. This is where your insulation strategy becomes critical.
Standard accordion side panels are a start, but for the best results, cut your insulated foam panels to fit the exact dimensions of the remaining window opening. These panels can be tucked behind the accordion wings or used in place of them entirely. Secure them with high-quality weatherstripping or specialized AC foam seal tape.
Pro tip: Don’t forget the gap created between the upper and lower window sashes. When the lower sash is raised to accommodate the AC, there is a large opening between the two panes of glass. Use a long strip of foam insulation to plug this gap and stop the “chimney effect” of warm air entering your home.
Long-Term Care and Maintenance
Once your installation is complete, perform a “leak test” on a hot day. Feel around the edges of the unit for any whistling air or warm spots. If you find them, apply more foam or caulking cord. Throughout the summer, remember to clean the filter every two weeks. A clogged filter makes the unit work harder, increasing your electricity bill and putting unnecessary strain on the motor.
When the season ends and it is time to remove the unit, be careful not to drop the wooden spacer. Store it with the air conditioner so that next year, the process of how to install a window air conditioner with a storm window is already halfway done. With the right preparation, your home can remain a cool sanctuary no matter how high the mercury rises.